Friday, January 31, 2014

Soupcon Hexagon Quilt Along Part 3

Soupcon Quilt Along (QAL)
Part 3 of 6

Welcome to Step 3 of my Soupcon QAL. If you missed Step 1 you will find it here and Step 2 is here. Step 3 won't take much time at all. I expect you can complete it in a couple of hours! You will need two fabrics, one for a ring that will surround your block and a second for your background. For me that is where I spent most of my time, selecting the fabrics!

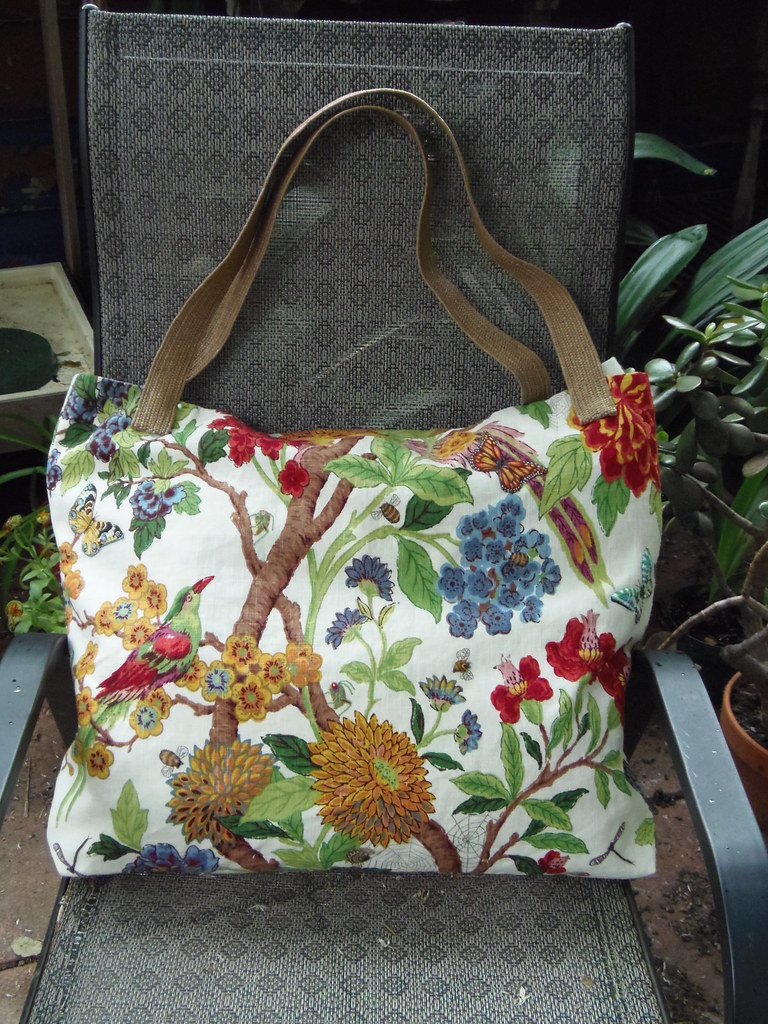
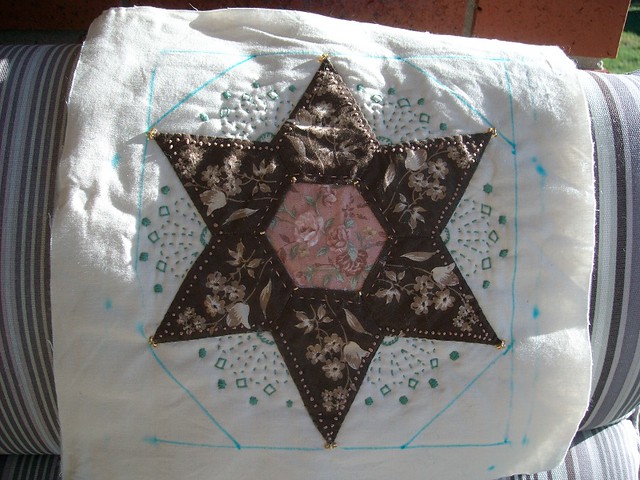
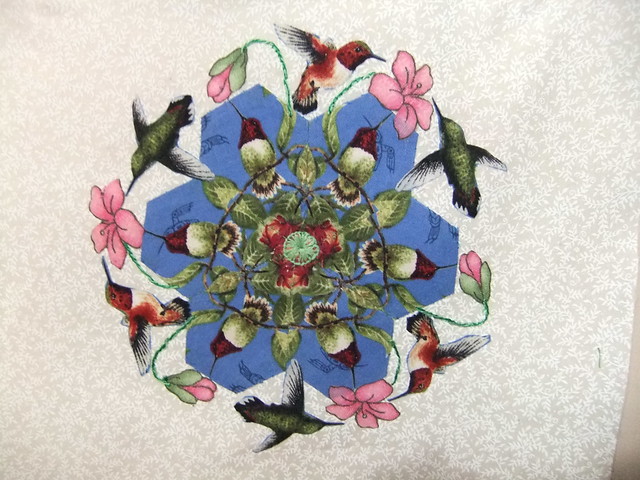
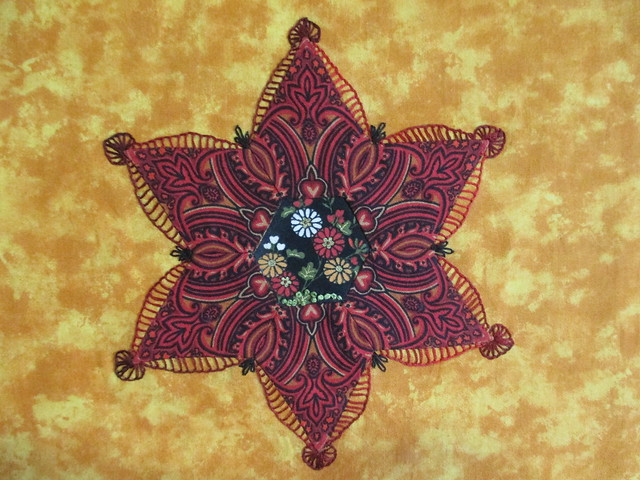
In Step 1 I had told you that you could use a large print like this one and that if you did you would start your quilt at Step 3. So if that's you it is time to pull out that large, lovely print! If you made a hexagon star or flower this doesn't apply to you!


Cut a 10 1/2" square of fabric. Be sure that your motif will fit inside a 8" circle. I like to give my fabric a spritz of starch and a good press. You are now ready to join those of us who are using a hexagon or star for our center medallion!

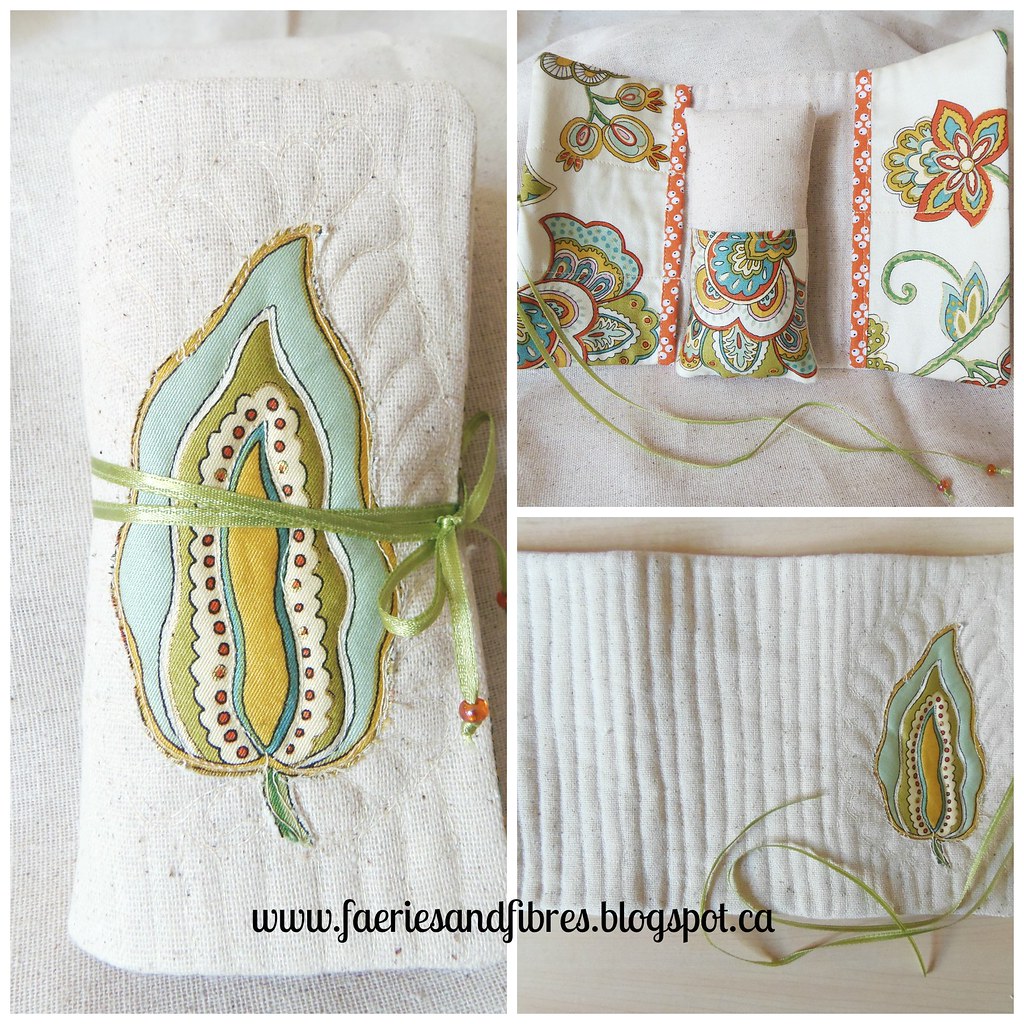
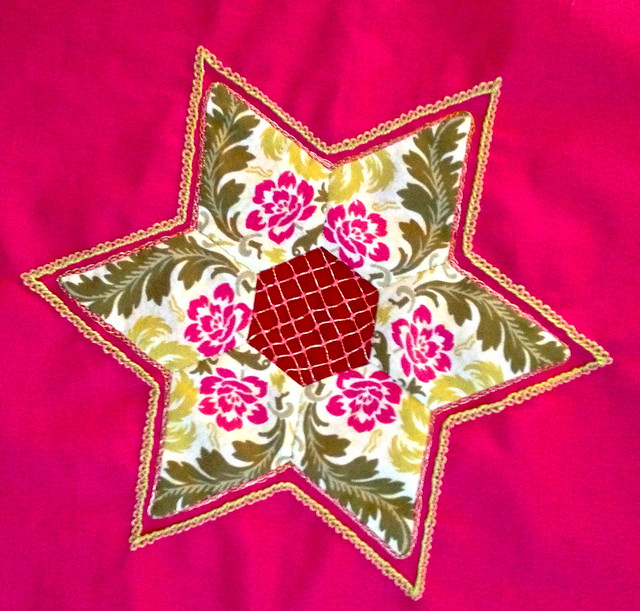
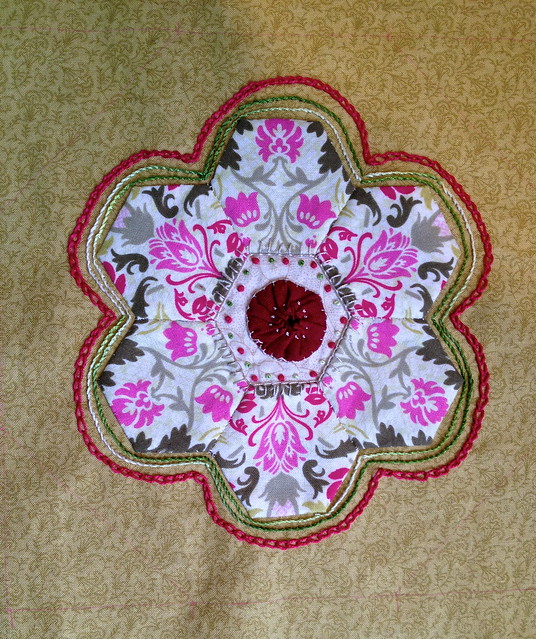
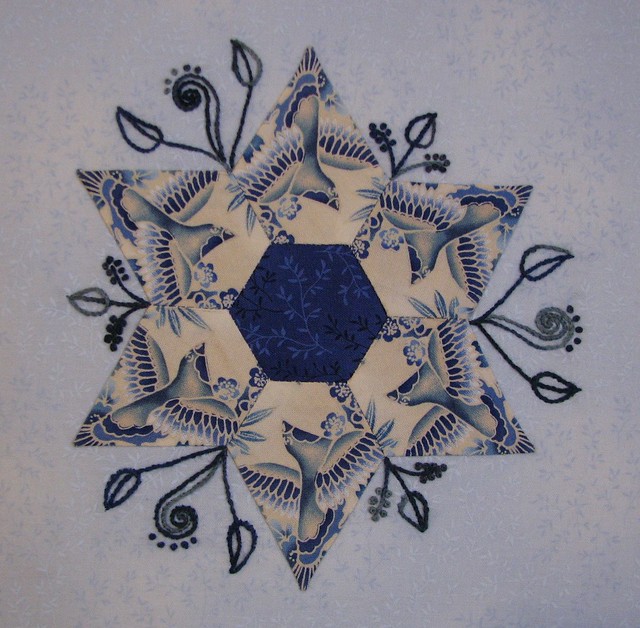
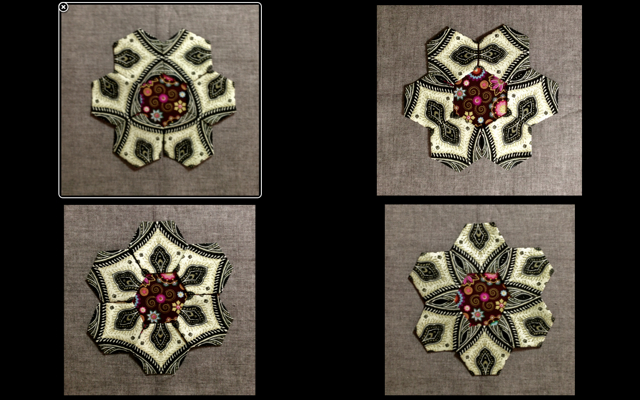
This is what your block will look like when Step 3 is finished. We will add the ring around our hexagon masterpiece and then applique the entire unit to a background fabric!


The Ring
To make the ring you will need a 10 1/2" square of fabric. Give the fabric a spritz of starch and give it a nice press with a hot, dry iron.

There are two ways to mark your fabric to make the ring. I have made a template that is one half of the ring and you will find it here. You can use this template to draw your ring on the fabric OR you can make the ring the way I did. You will need a compass that can open up enough so that the space between the needle point and the lead measures 4 3/4". Fold the 10 1/2" square in half and then in half again. Give the folds a light press so that they are clearly visible. Tape the square to a cutting mat.


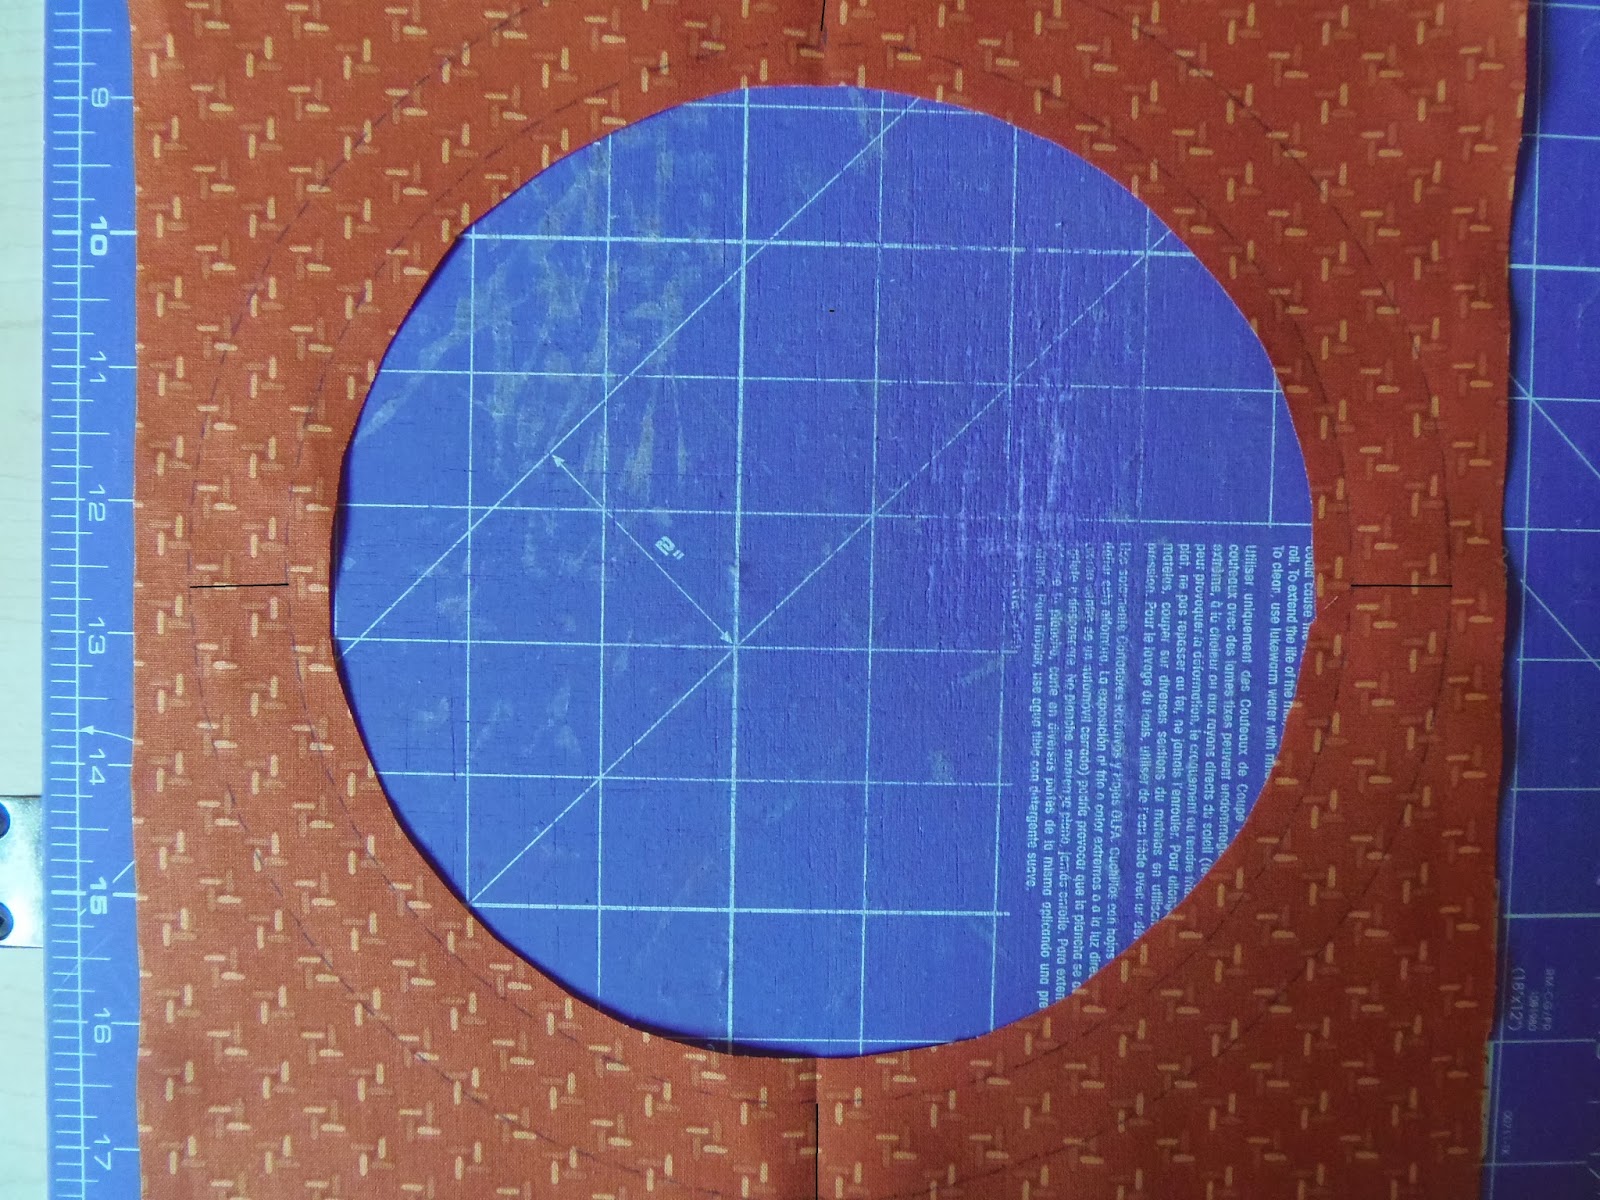
Set your compass so that the distance between the needle point and the lead is 4".


Position the needle point in the center of the fabric where the two folds cross. Draw a circle. Open up the compass so that the distance between the needle point and the lead is now 4 3/4". Position the needle point in the center of the fabric. Draw your second circle.


The pencil lines from my compass were faint so I used my Frixion pen to draw on top of the pencil lines. These lines represent the finished size of the ring. HELPFUL TIP for TROUBLE SHOOTING: If your embroidery strays into the area of the ring, simply increase the size of the inner ring. If you set the compass and 4 1/4" it will give you an opening of 8 1/2". You will also need to adjust the size of the outer ring. Instead of setting the compass at 4 3/4" you will need to set it at 5"


Once you have drawn the circles on your fabric, make registration marks on the ring with  fabric safe marker at the each of the fold lines. These marks will be used to line up the ring on the hexagon block. Cut out the excess fabric on the inside of the ring being sure to leave at least a 1/4" seam allowance.


Clip all the way around the circle making sure that your clip marks are a couple of threads shy of the pencil line. My clips were about 1/4" apart.


I like to finger press to turn under the seam allowance first and then baste it with thread. HELPFUL TIP: When finger pressing pinch the fabric. Release, move your fingers over a little and pinch again. Do not drag or slide your fingers along because you will distort the fabric and it won't lay flat. If you prepared your fabric with a little spray starch it will help give you a nice crisp crease when you finger press.

Give your hexagon block a spritz of starch and press with a hot, dry iron. Locate the center point at the top and bottom and sides.

I placed a flower head pins at each of the points.


Line up the registration marks on the ring with the pins on the hexagon block. Pin at each of the four points. Smooth out the ring fabric and pin all around the inside circle of the ring.


Applique the inside edge of the ring to the hexagon block. You can applique by hand or machine. It is up to you.

Trim the excess background fabric on which you appliqued your hexagon - make sure that there is at least a 1/4" of fabric seam allowance.


HELPFUL TIP: Save all of your scraps that were trimmed because you might want to use them in future steps. By repeating those fabrics in other parts of the quilt gives it a cohesiveness even though it is a scrap quilt.

DESIGN OPTION: You could stop right here. Make multiple blocks and sew them together for a quilt! I think it would make a stunning quilt. This would be a great way for Nellie to use all those lovely black and white modified hexagon blocks that she made! Jean also made a lot of blocks which could be turned into a quilt. Before you decide, why not finish reading the instructions to see if you would like to carry on!


The final step for the ring is to trim the excess fabric from the outer edge being sure to leave at least a 1/4" seam allowance. I like to turn under the seam allowance and finger press before I baste it under.


When I baste the outer curve I take very small basting stitches because I find that I get a nice smooth curve. If I take larger stitches little pleats form and those pleats look like points from the right side. HELPFUL TIP: If you do get a pleat paint a little starch on just that spot, smooth out the pleat with your fingers so that the curve is smooth and then press with the tip of a hot iron. Don't burn those fingers because you still need them for a little hand sewing!


The Background

It is time to select the fabric you will use for a background. I auditioned fabrics until I found the right one. I simply spread out a piece of fabric and placed the hexagon block on top. I tried more than a dozen fabrics until I found the one I wanted. Take your time because you've got two weeks until the next step!

This is my hexagon block with the ring. It is on the fabric I used to make the modified hexagon star. I wasn't crazy about this background so I auditioned it on several fabrics until I found what clicked with me! When I look at this the background is too busy and it takes away from the lovely work I did on my hexagon. I opted to go with a small soft print.


Once you've selected your fabric you are going to need to cut a square. The size of square you need is 12 1/2" HOWEVER I cut a 13" square, gave it a spritz of starch and pressed it with a hot dry iron. I then trimmed it to 12 1/2". Once trimmed to size I folded the square in half and then in half the other way.

Place the hexagon with the ring on the background fabric and line up the registration marks on the ring with the folds on the background fabric. Pin well with applique pins or thread baste the ring to the background Applique the ring to the background using your preferred method.

DESIGN OPTION: If you like what we've done so far why not make a quilt entirely of these blocks? You can embellish with embroidery or not - your quilt, your choice! Wouldn't it be fun to make a quilt of these blocks and then applique a small hexagon motif on the intersections where the blocks meet? As always, let the creative juices flow!


That's it for Step 3! I hope you are enjoying making your blocks as much as I enjoy seeing them. Don't forget to post your pictures on the Soupcon FLICKR Group and while you are there be sure to check out what everyone is doing! Step 4 will be released on February 14. I'll be challenging you to try something you might not have tried before so I hope you will give it a go. If you think it is too challenging I'll be sure to provide you with some design options! Our Soupcon quilts are going to start to grow!

Also for all you hexie-aholics it is hexie Friday over at A Quilting Readers Garden so don't forget to pop in for a visit to see what others are doing!

Until I post again, happy sewing!
Karen H

Thursday, January 30, 2014

Secret Tote Bag Swap and a honey of a quilt

It is sign-up time for round 3 of Lia's Handmades Secret Tote Bag Swap. If you've never participated you are missing out on a lot of fun!

For this round the theme is geometry. Sign-up is open until January 31st. The way it works is that you fill out an online form which includes your likes and dislikes, you create and post a mosaic of the things you like including bag styles and then you submit your form. You'll be assigned a partner for whom you will make a tote bag based upon her likes and dislikes and someone else will have your name. You can put little treats in with your bag. I've participated in the previous swaps and have lovely bags that I use all the time. And there were plenty of little treats such as fabric, rulers, chocolate and handmade little gifts. For a complete list of the rules and the sign up form go here.

This is the first swap bag I made. It was a lovely linen like print and I embellished it with dragonflies, butterflies, bees and spiders!

This is a little roll up sewing kit with a matching pincushion that I made to go along with the tote bag I made in Round 2. The paisley print I used was the leftover lining from the tote bag!


Lately I've received a number of inquiries about this little quilt and how I made it. I made it for my Mom and I called it Quilting Bees!

Quilting Bees, 12 1/2" square

I used 1/2" hexagons which you can find here. I basted my hexagon papers to various honey colour scraps of fabric and stitched them together. Once it was pieced I gave it a spritz of starch and a good press with a hot, dry iron. The basting threads and papers were removed. I cut a piece of brown fabric and appliqued the honeycomb to the background. I trimmed away the excess brown fabric underneath the honeycomb.


Bees were appliqued to the honeycomb. To start I mad a template for a wing. I cut one wing out and then reversed the template for the wing on the other side. I stitched the wings down. I drew the bodies on a yellow on yellow print fabric and used my Sakura pigma pens to mark the bodies with a dark head and stripes. I made sure that the pattern on the bodies went right into the seam allowances. Once they had been inked I cut them out and appliqued them to the quilt top. I poked a little stuffing into their bodies just before I finished appliqueing them down so that they were dimensional. The method I used was very similar to that I described in my tutorial on making bees - it was a honey of a demo!


The fabric I used for the bees wings was very light so I used an outline stitch and some brown DMC floss to outline each wing so that it wouldn't blend into the honeycomb background.


The last step was to make a quilt sandwich, quilt and bind the quilt. It was surprisingly easy and loads of fun!

Friday morning Part 3 of my Soupcon Quilt Along will be published. So let's have a look at the blocks that were published on the Soupcon FLICKR Group since our last trunk show. Next time the pictures are posted they are going to look different!

Jean continues to produce wonderful blocks such as this one. She used DMC metallic thread for the laid work in the center and green perle #5 cotton for the outer Pekinese stitch. She wrote that the "backstitch which is the basis for te Pekinese stitch and the couching stitches on the laid work are perle #5 cotton in pink. I found it helpful to use a blunt tapestry needle for the Pekinese stitch". Thanks for that great tip Jean!


And this is Jean's eighth and final block. About this one Jean wrote that she worked the "yoyo in the centre with #12 perle cotton blanket stitch. French knots aroung it are #8 perle cotton rose pink and two strands DMC variegated green. Outer scallops are chain stitch #8 perle cotton rose pin, two inner rows of stem stitch in two strands DMC variegated green". I think the chain stitch almost looks as though cord has been couched around the outside of the block. Very effective!


Cee-Emm posted this pretty block. She wrote "I quilted the design onto this block, hoping the next stages don't cause me to gnash my teeth because I did". It might be a bit of a challenge but it will be an opportunity to get creative! It is a very pretty block so I hope we can find a work around!


Brigitte68 posted her block. Check out the beautifully embroidered roses in the center. One of the comments was "that center is out of this world wonderful and the embroidery is so well executed... beautiful and clever". Isn't it just!


Grace has embellished one of her blocks and it is wonderful! It will be a birthday gift for her sister. Lucky sister! Grace fused the hummingbirds and flowers. She asked if they need to be stitched down and I suggested that if it is to be a wall hanging it won't be washed or used so it should be fine but that she could always secure the edges with monofilament when she quilts the piece.


A Passion for Applique's block reminds me of the china pattern "willow". I really like the curlicues with French knots and also the little sprigs of French knots. Very whimsical!


Nellie continues to make blocks from her fabric. Here she has arranged the six patches in four different layouts and is asking which one?  I have no idea how she will pick one because they are all wonderful!


This one is Nellie-knot-a-palooza! It is heavily embellished with colonial knots and buttonhole stitch. Totally gorgeous!

Nellie outlined this block to create a lacy pattern around the outside edges. I love how the hard lines of the block are modified and softened by the embroidery. Be sure to visit Nellie's blog post on January 29, 2014 to see where she is going with all of her lovely blocks!


And the last block comes from Clare! I love the buttonhole border and the little trilobal details at the inner corners. The buttonhole stitch is so lacy and it is wonderful the way the background fabric shows through the stitches. Another pretty block taken to the next level! Beauty!


So that's what's been posted on the Soupcon FLICKR Group. If you would like to have a closer look at all of the details in these wonderful blocks head on over for a look! I expect to see some even more spectacular results after Part 3 is posted!

Until I post again, happy sewing!

Tuesday, January 28, 2014

An apology and another tutorial - combining it all into one fabulous hexagon

I made a mistake - mea culpa! I work very hard to credit to others for their work and ideas but I recently made an error in attribution. In my January 26, 2014 post  I shared pictures of blocks made by Soupcon Quilt Along participants. I incorrectly labelled one block and gave credit to the wrong maker. The block in question was made by Talb9999, not Jean. I thank Talb9999 for bringing the error to my attention and I sincerely apologize to her for the error.

The offending post has been corrected and by way of an apology, I would like shine the spotlight on Talb9999's block. This is her first hexie block and first time English paper piecing EVER! Amazing! The block is embellished with little rosebuds. She was asked if they are wrapped ribbon but said she "didn't have any ribbon the right size so she used material and doubled it over to avoid rough edges". To see a close-up of this blog visit Talb9999s blog! To see more wonderful Soupcon blocks please visit the Soupcon QAL FLICKR Groupl! 


Tutorial Time!!!!  I've showed you three hexagons which are all variations on a simple star. I started with a tutorial for this simple star block on January 19, 2014 and January 20, 2014.


Then on January 23, 2014  I posted a tutorial for this block. I used the same method as for the previous block but added a border around the inner edges.


The third tutorial and variation of the star block was on January 26, 2014 . In this block the star points are divided in half and made with two different fabrics.


So now it's time for the fourth tutorial in which elements from all three stars are combined!

You will need a sheet of 1" hexagons which you can find here. Start by drawing your sewing lines to form the start points on the hexagons; the directions were in my January 19, 2014 post. You'll need six star points and one hexagon for the center.


The next step is to add the horizontal line that is 1/2" up from the base of the star.


The last step is to divide the remained of the star point in half. This line will be used to match up the seam of the two fabrics used to form the star point. As always the numbers represent the order of placement and sewing of fabrics.


If you've been reading my blog you have the basic technique down pat so I'll go through the steps quickly! If you aren't familiar to could start with my January 19, 2014 post for the basics.

To make the star point stitch two 1 1/4" x 6" strips of fabric together along the long side. Press the seam open and cut six 1" slices. The papers are tacked with a dab of glue to the wrong side of the fabric making sure to lineup the seam on the line in the star point.


 Fold on the line and trim the fabric.

Cut twelve background pieces that measure 1 1/2" x 2".  With right sides together stitch a background fabric to the star point. Don't forget to shorten your stitch length. Trim the seam allowance if necessary and then fold back the fabric. Finger press or press with a hot, dry iron.


Repeat on the other side and trim the fabric around the outside being sure to leave a seam allowance of about 3/8".

Carefully pull the paper away from the stitches, fold it back on the line and trim the seam allowance down to between 1/8" to 1/4".


With right sides together stitch the last piece to the base of the star. Press it open and trim the remained of the seam allowance.

Baste using the traditional English paper piecing method.


I like to chain piece so I'm working on all six hexagons at once. After they are all basted they can be stitched together. The colour change in the star point is very subtle but very effective!


Now if you really want to have fun with all of these hexagons why not try some different arrangements? How about this one for starters!


Think outside the hexagon!

This could be the beginning of something interesting!


How about this little switcharoo?


So how did I decide to stitch them together? Well I can't tell you right now because I've got oodles of hexagon fun planned so you'll just have to stay tuned if you want to find out what I did with them!

One of my lovely readers recently told me about The Needle and Thread Network. It is a place where Canadian fibre artist of all sorts can display their work on WIP Wednesday. Sign ups begin on Tuesday and close on Thursday. You can check out this blog here!

Until I post again, happy hexagoning!
Karen H