
I am quilting Good Golly Miss Mollie (my version of the Godstone Grannies coverlet) on my domestic sewing machine. The first thing I normally do when I begin to quilt is ditch quilt but that might not be the best approach for a hand stitched hexagon quilt. I decided to stitch melon wedges (little crescents) in the path because I can work continuously from the top of the quilt to the bottom with no stops. When all these little melon wedges are stitched the result is a little star in each path hexagon. You can see the melon wedge stars on the path. The best part of all is that it serves the same function as ditch quilting which is that it stabilizes the quilt so nothing will shift. Once I've ditch quilted I can go back and quilt inside the blocks which are diamonds shapes made up of hexagons.

To quilt the melon wedges on Good Golly Miss Mollie I used a polyester 50wt thread on top in a colour that matches the path fabric. This helps the quilting disappear and all that is left is the texture and image of the little star. In the bobbin I used Superior's The Bottom Line in a neutral colour. My needle is a Superior Titanium Topstich 90/14. The machine that I'm using is a Juki TL2010Q mechanical (not computerized) sewing machine. I begin at the top of the path and quilt a little melon wedge or crescent in the first hexagon. You can see my start point in the red circle. Once I've quilted the wedge I quilt the next one to the right.

The next wedge is stitched in the same hexagon where it touches the next path hexagon.

I move to the next hexagon and quilt a wedge on the other side of the wedge I just quilted and this creates sort of an elliptical shape. Then I'm on to the top side of the same hexagon. I continue quilting in this way until I reach the point where I need to change direction. I stopped at the red circle because I want to continue quilting in a downward direction. The path will be quilted in a zigzag direction.

I continue quilting the melon wedges until I get to the bottom of the path.

Now I want to quilt up the other side of the path that I just quilted.

I continue until I get all the way back to my starting point.

I go back to the top of my quilt and begin to quilt melon wedges (marked in green) in the next part of the path.

I continue all the way to the bottom of the quilt

and then I come back up and quilt melon wedges on the other side of the hexagons.

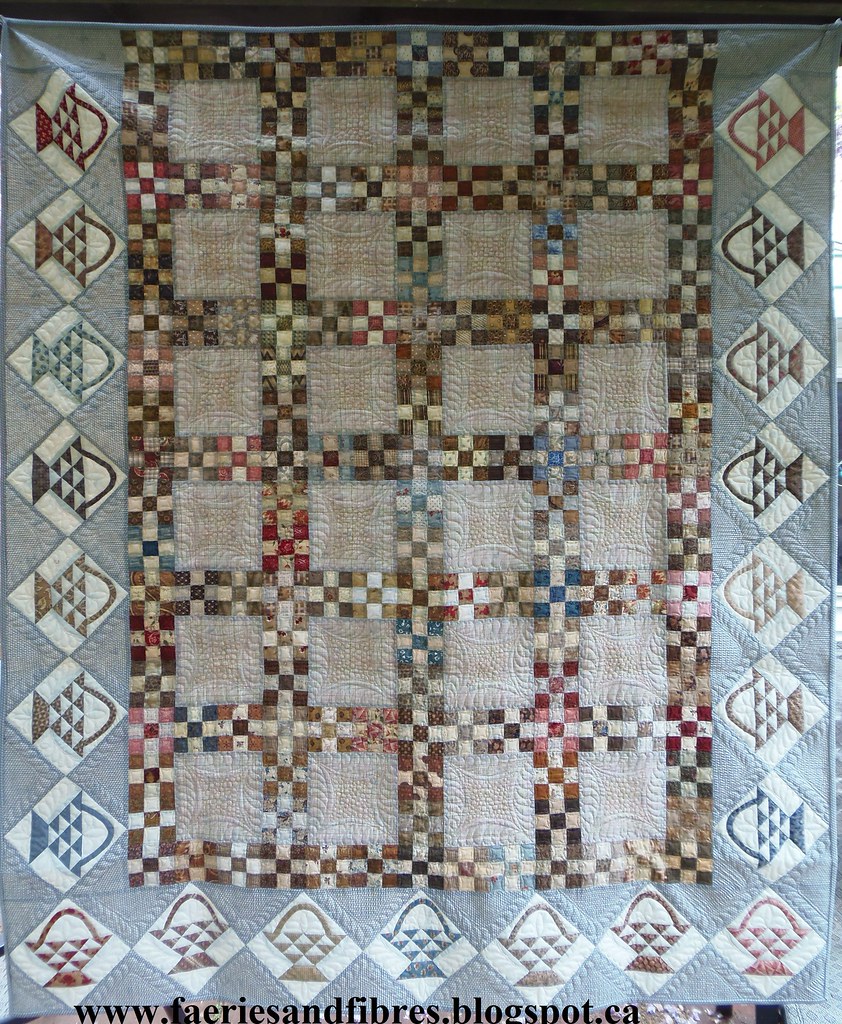
So there you have it - melon wedges. These little shapes are a great way to stabilize a hexagon quilt path and it is a shape that is easy to manage on a domestic sewing machine. The hexagons in Good Golly Miss Mollie are 3/4" so the wedge is relatively small and easy to quilt. The wedges don't have to be perfect or identical. Similar is good enough because when the quilting is done what you will see is the overall texture. This melon wedge shape also works well in other blocks. When I made my Baskets and Nine Patches quilt I stitched them in the little 3" nine patches. I like a flat quilt and the melon wedges produce that look and feel.

This is the finished quilt Baskets and Nine Patches. You will find a free pattern for this quilt under the tab Patterns by Karen H.
Until I post again, happy quilting on your domestic sewing machine!
Karen H
Thank you Karen. That was really helpful! One more question - why do you quilt with a 90/14? I think to use that size only for denims and bag construction where I am going through stiff layers.
ReplyDeleteThank you Karen for the very detailed illustrations. I am working on a hexagon project and I think I will give it a try. From what I understand, practice is what is so important.
ReplyDeleteInteresting post - thank you for all the sharing!
ReplyDeleteAwesome tutorial! I hate stopping and starting. So great to see how this will work with nice long runs. It's going to be beautiful.
ReplyDeleteI agree awesome tutorial!! thank you Karen
ReplyDeleteWell done on the tut. And your basket quilt is wonderful!!
ReplyDeleteWow - thanks, Karen! I see a possible book with quilting post like these about hexagons. There are books about hexies, but none about how to quilt them. Think about it. And thanks so much for all you share with us.
ReplyDeleteThis is so useful Karen. Thank you for the clear instructions.
ReplyDeleteThat was a fantastic tutorial. I still think you should go to a publisher and propose a book. I'd buy it.....of course, I'd want it autographed.
ReplyDelete